

"Cloning" in simple English means producing identical individuals either naturally or artificially. If you are familiar with the term, there is no surprise what is going to be in this tutorial. Before coming on to What is Cloning in Git or Git Clone, I hope the reader is well-versed with the process of Forking in GitHub.
Sometimes, non-technical people or the people who have not yet worked on Git consider these two terms (Git Clone & Git Fork) as similar. Actually, they are, but with some differences. It is better to rinse your brain with forking before learning the concept of cloning in Git.
Also, since the basics of Git and GitHub has already been covered in this course, from now on we will use both of them to perform the operations and procedures on our code/files. On the greater circle, this tutorial will make you familiar with:
- What is Cloning?
- Purpose of Cloning
- Importance of Cloning in Git
- Cloning a repository and Git Clone command
What is Git Clone or Cloning in Git?
Cloning is a process of creating an identical copy of a Git Remote Repository to the local machine.
Now, you might wonder, that is what we did while forking the repository!!

When we clone a repository, all the files are downloaded to the local machine but the remote git repository remains unchanged. Making changes and committing them on your local repository (cloned repository) will not affect the remote repository that you cloned in any way. These changes made on the local machine can be synced with the remote repository anytime the user wants.
Why Clone a Repository?
As mentioned in the previous sections, cloning downloads the complete source code to the local system, let’s go through the real reasons why cloning is required ar the first place:
Contribute to Organizational Projects: A centralized system is required for organizations where multiple people work on the same code base. Cloning helps us achieve this motive. By cloning, people can edit the project code to either fix some issue or provide some modifications i.e. an extra or extended feature. This definitely helps in producing better software in less time with greater collaboration.
Make use of Open Source Repositories: A famous idiom in English, "Do not reinvent the wheel" is suitable for this point to understand it. Similarly, if someone wants to use some functionality which has already been developed by someone else, then why to code it from scratch and waste time & resources? For e.g. there are unlimited opensource repositories are available, which can directly fit into the projects.
Since cloning is so important part of the Git and GitHub journey, it is better to see in detail how cloning works. It is a very simple and straightforward process to which the next section is dedicated.
How does Cloning in Git works?
A lot of people want to set up a shared repository to allow a team of developers to publish their code on GitHub / GitLab / BitBucket etc. A repository which is uploaded online for collaboration is called an Upstream Repository or a Central Repository.
A central repository indicates that all the changes from all the contributors pushed into this repository only. So, this is the most updated repository instance of itself. Sometimes this is often called as the original repository. Now, the image given below is pretty clear about the concept of cloning.
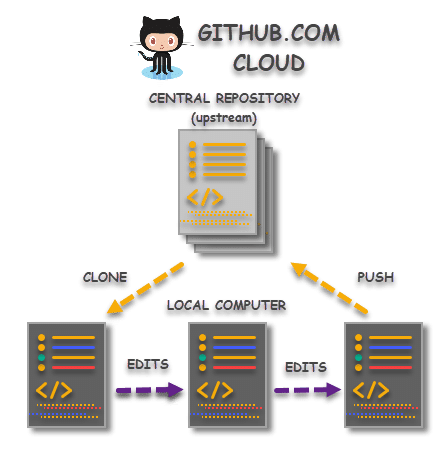
With respect to the above image, the cloning process works in these steps:
Clone a Repository: The user starts from the upstream repository on GitHub. Since the user navigated to the repository because he/she is interested in the concept and they like to contribute. The process starts from cloning when they clone the repository it into their local machine. Now they have the exact copy of the project files on their system to make the changes.
Make the desired changes: After cloning, contributors provide their contribution to the repository. Contribution in the form of editing the source files resulting in either a bug fix or adding functionality or maybe optimizing the code. But the bottom line is, everything happens on their local system.
Pushing the Changes: Once the changes are done and now the modifications can be pushed to the upstream repository.
Note: Owner of the repository can allow/disallow direct changes to Central Repository, set various notifications(notification for any change pushed to central Repo) and many more, but all these settings will be covered later in this series of Git Tutorial.
Git Clone
Cloning in Git can be done on the self-owned repository or anyone else’s repository. In the following section, we will clone the Maven_Project repository available on my GitHub account. You can create a new GitHub repository and try to clone the same.
How to Clone a Repository or use Git Clone Command?
Cloning a repository from GitHub is a simple process. But, before cloning, please ensure you have a repository on your GitHub account. In this section, I will make use of the Maven_Project repository( For War File Build) (reference).
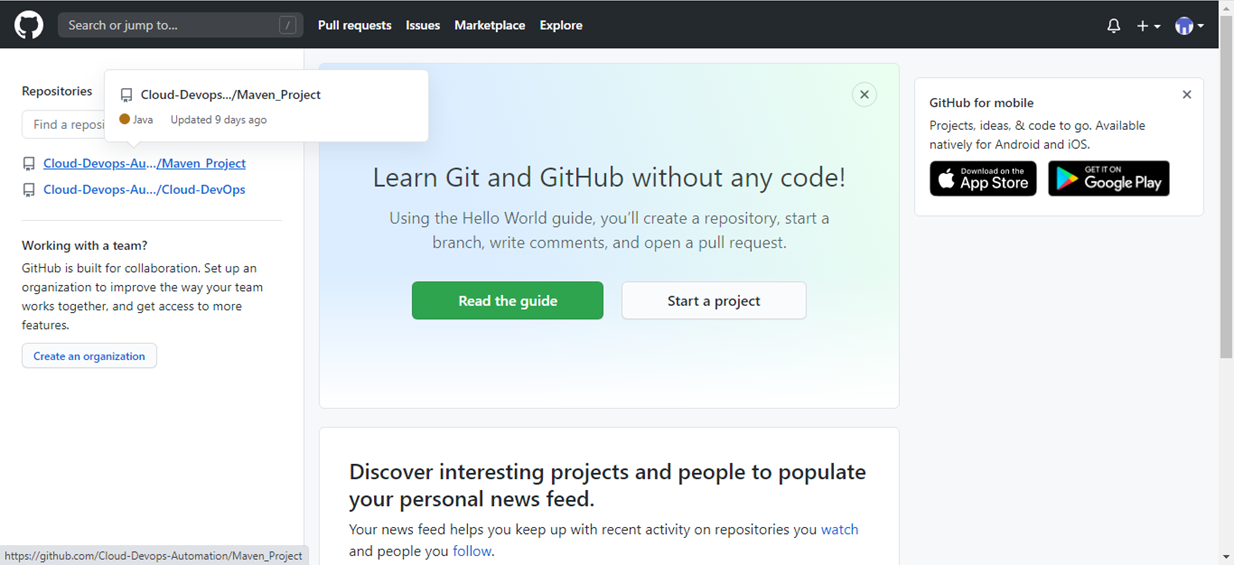
1. To clone a repository, go to the repository page which you want to clone. This can be done through the side column on your dashboard.
2. Press Clone or download button.
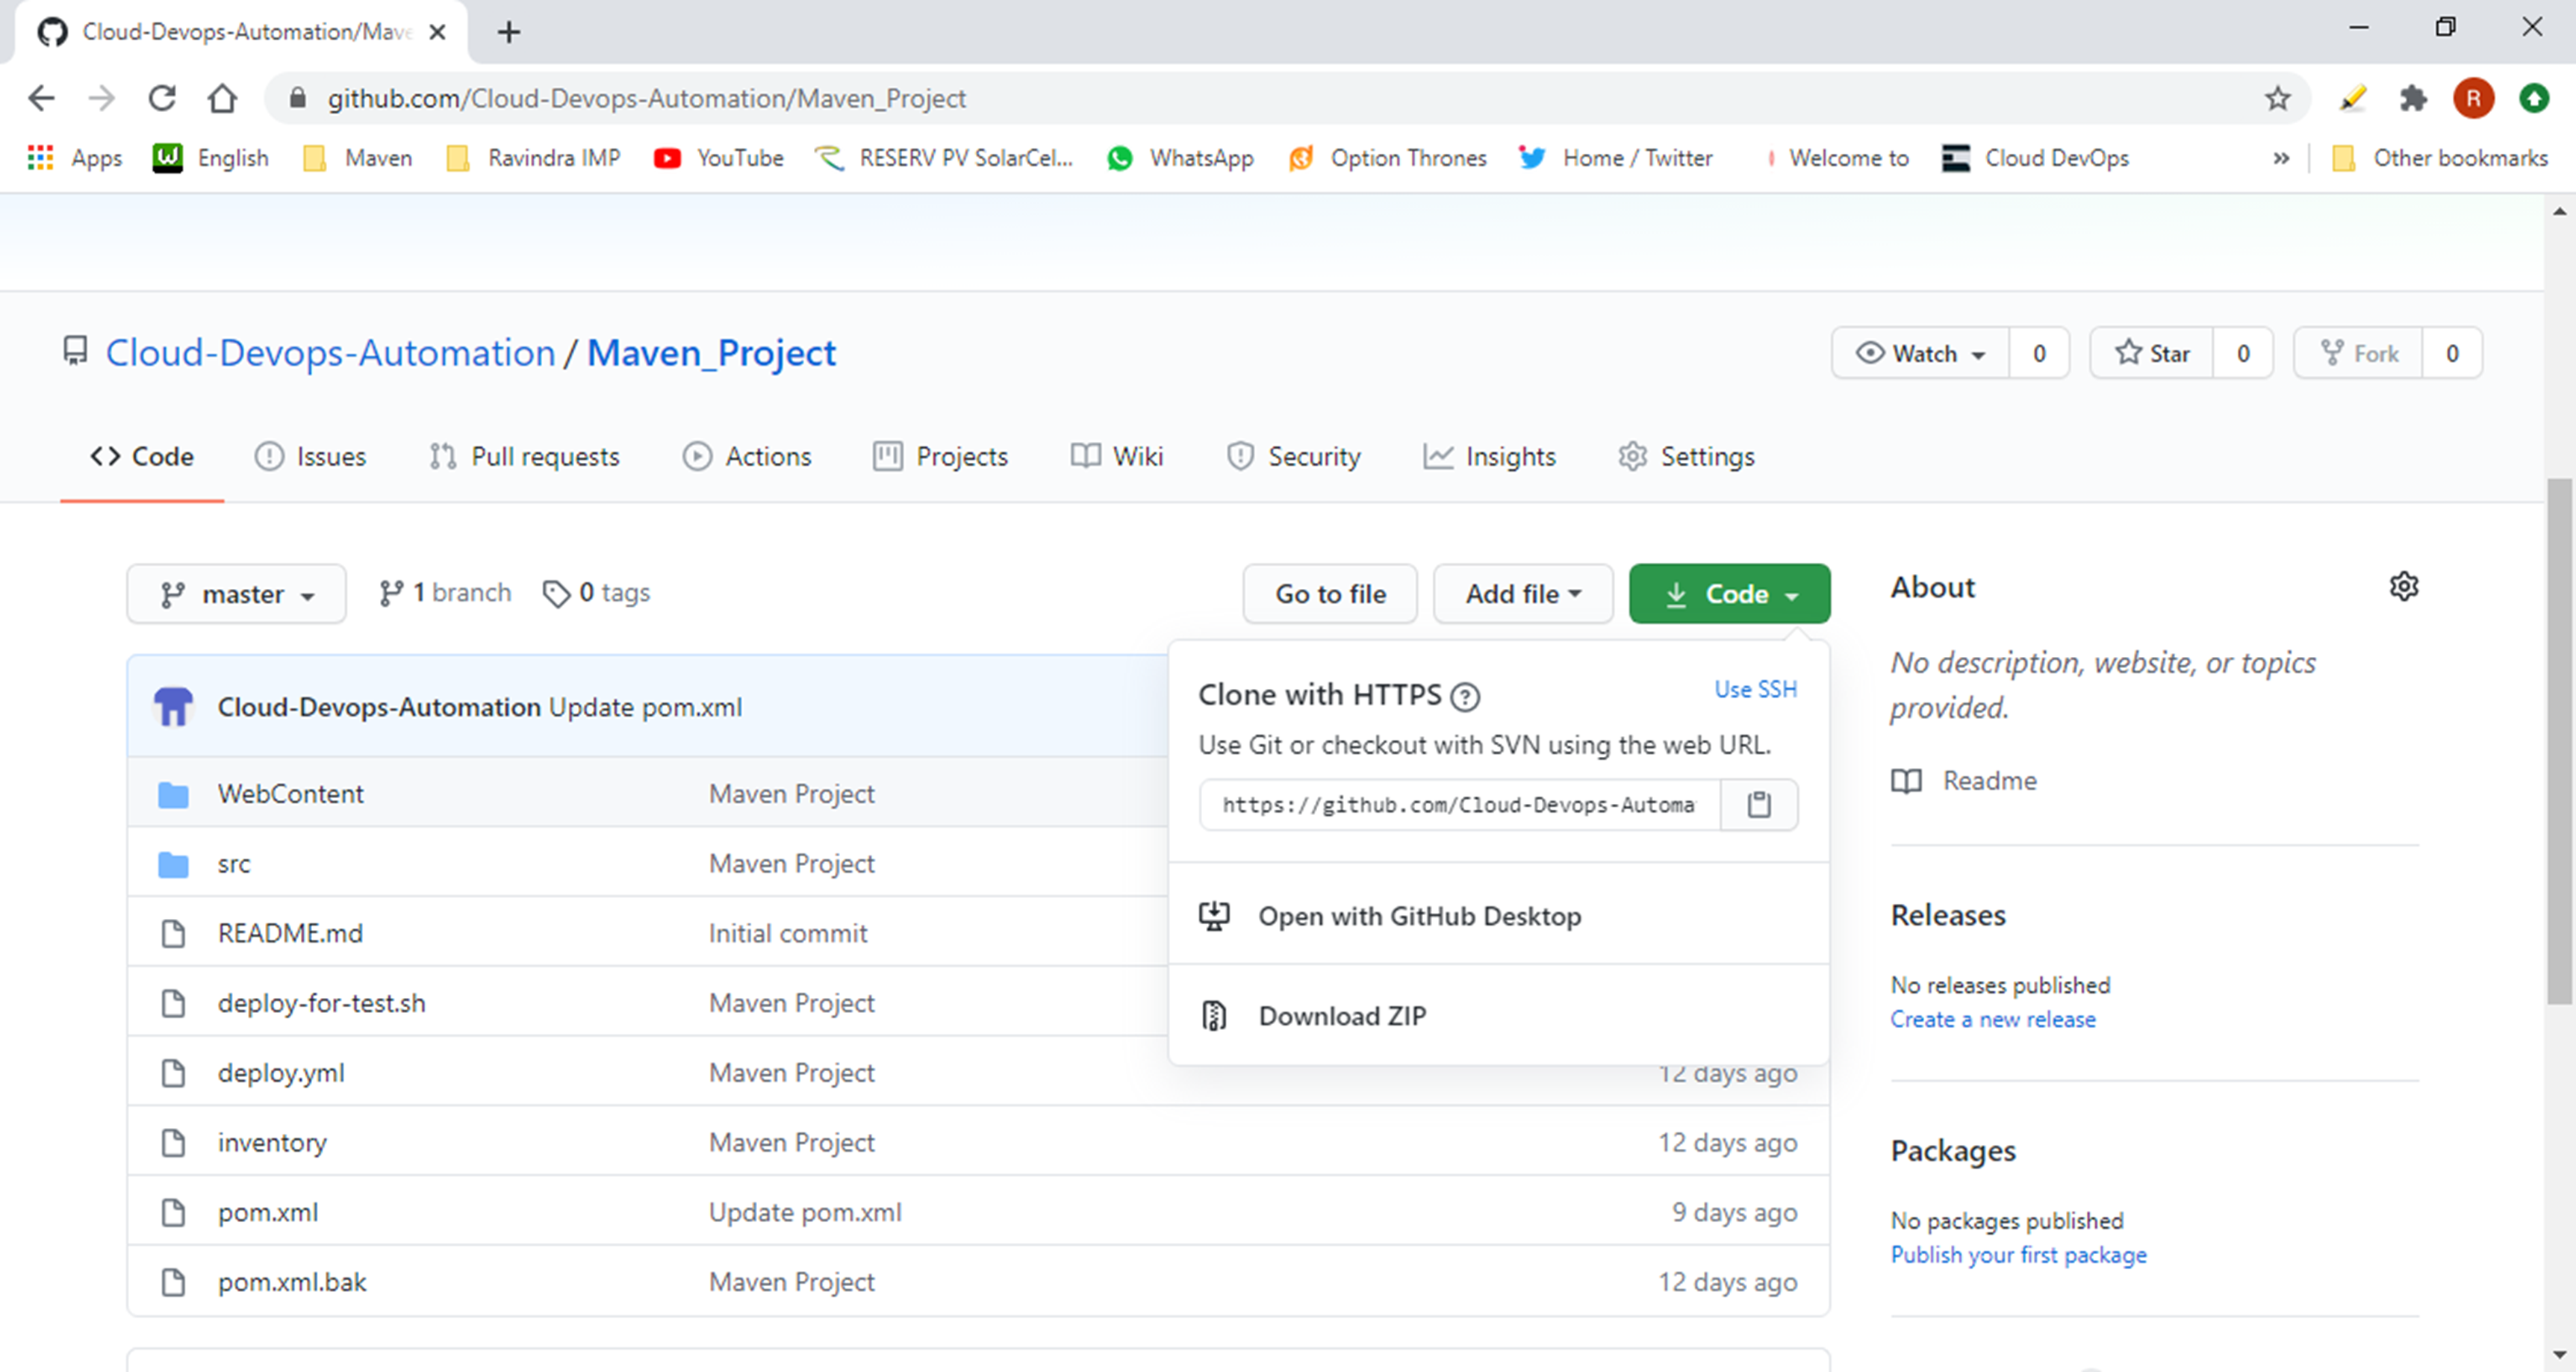
3. Copy the code that appears after pressing the button.
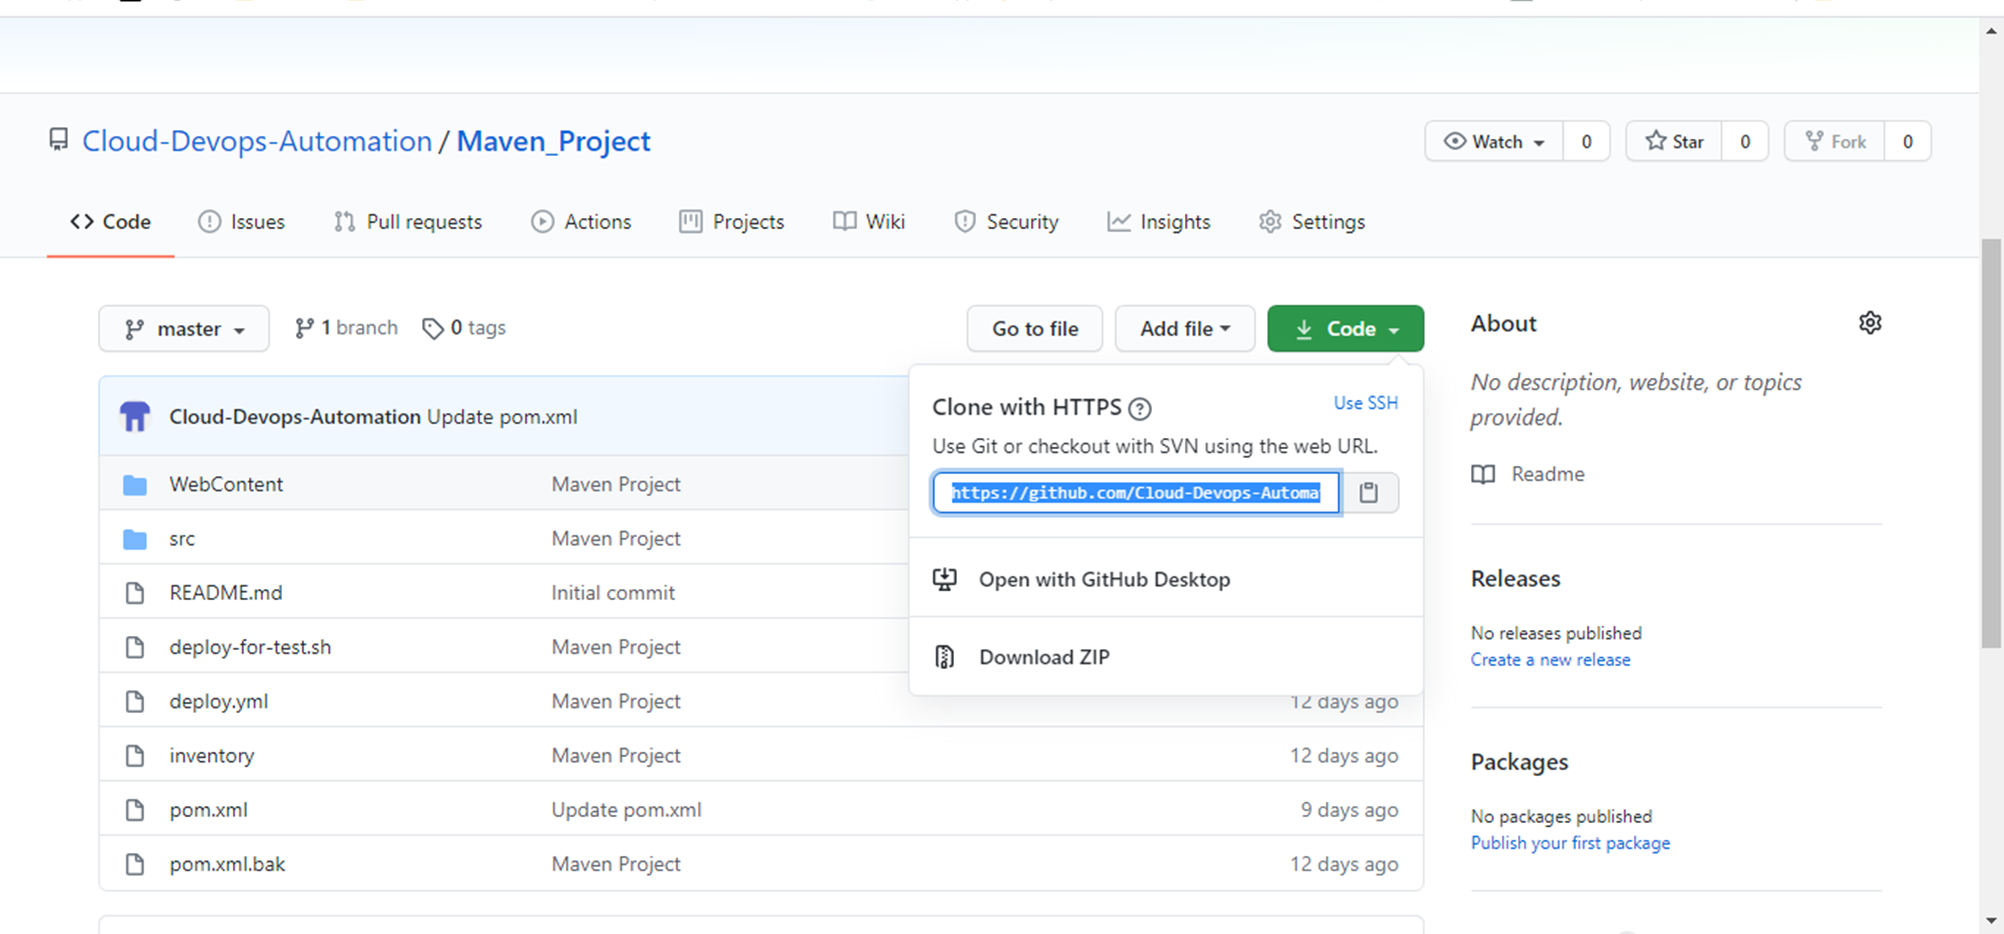
Note: The Use SSH function located beside Clone with HTTPS will be explained in detail in SSH tutorial but as of now we are cloning the repository with https ("Clone with HTTPS") not ssh .
4. Once done, open Git bash on your system.
Note: Remember to change the directory to which you want to clone the repository. I have marked my directory Git Repo Maven_Project in the above image in which I will be cloning the repository from GitHub.
5. Check the directories (or repositories) already created under this directory. (using ls command)
As seen in the image, I have just one repository under the directory Git Projects.
6. Press the following command to clone the repository:
git clone <URL>
URL here represents to the same URL that we copied in the third step.

Now Maximize the Git Bash Window
Paste the Git HuB Repository URL in The Git Bash at Command Prompt. Example Fallow the Bellow the Picture

Note: URL is the link of the repository over GitHub Cloud. You can type this into the address bar in your browser and check if the repository page opens or not.

It would take a few seconds to clone the repository on to your system.
7. The following message will appear as you press enter.
It would take a few seconds to clone the repository on to your system.
Note: Please note that cloning depends on the internet connection and the time would depend on your connection bandwidth. If the Git is not able to clone due to weak connection, it would display a fatal error and the user is requested to try again until the above message does not appear.
8. Confirm the cloning by listing the directories once again using the ls command which lists all the files and folder.
Since the Centralised Repository in our case called Maven_Project, the same has been copied to my local machine.
Check in the local drive by navigating to it manually.

As clearly seen, we have successfully cloned the repository from GitHub. Now we can work on the files on our local system like normal code files. Cloning is very helpful as you might have guessed and used very frequently by the people using Git or GitHub for their software development. Once the changes are made, the user pushes the changes to the original repository on the cloud (GitHub) and makes it available to everyone who is watching it or contributing to it. Now it’s the time to clear the fuzz between Git Clone and Git Fork.